About 10 minute read
Commercial Roof Leaks: Finding the Source and Assessing Severity
A roof leak means the waterproof
The urgency of a leak depends on volume, location, and what is at risk below. A minor drip in a storage area is a different situation than steady water flow above a server room or retail floor. This guide helps you assess severity, take the right immediate actions, and communicate effectively with the roofing professional who will perform the repair.
If you have an active leak right now, use the diagnostic tool below. It will help you narrow down the probable source based on where water is appearing inside the building, and provide specific guidance for your situation.
Where is your leak coming from?
Question 1 of ~4
Where inside the building is water appearing?
How to Identify a Roof Leak
Roof leaks announce themselves through several symptoms, and the earliest symptoms are not always obvious. Active dripping from the ceiling is the most recognizable sign, but by that point, significant damage has already occurred above the visible leak. Learning to recognize earlier indicators can save thousands of dollars in insulation replacement and interior damage repair.
Active Indicators
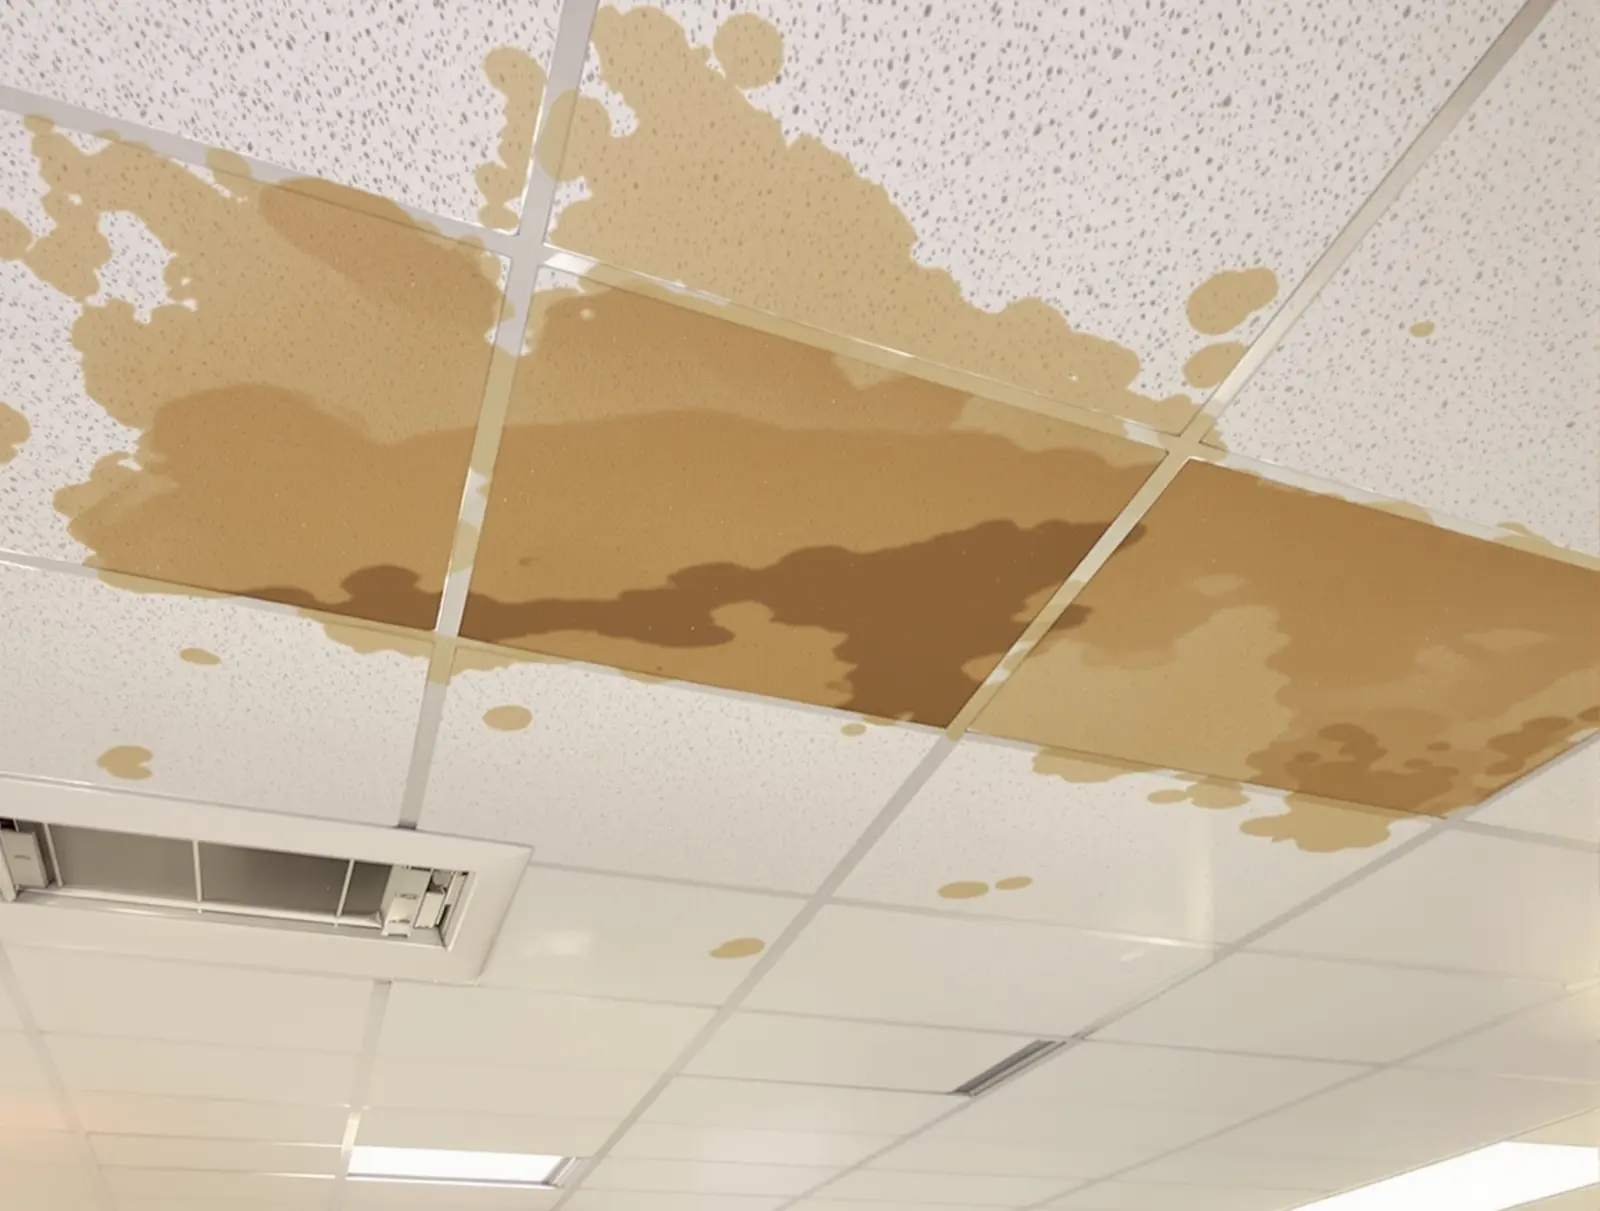
- Water dripping from the ceiling — the most obvious sign, indicating water has saturated the insulation, traveled across the deck, and found a path through to the interior
- Water stains on ceiling tiles — brown or yellow discoloration indicates water contact, even if the dripping has stopped. Replace stained tiles to make future leaks immediately visible
- Wet spots on interior walls — particularly near the ceiling junction, indicating water traveling down from the roof-to-wall transition
- Water pooling on the floor with no obvious plumbing source — can indicate a roof leak traveling down a wall cavity or structural member
Early Warning Signs
- Musty or damp odors — moisture trapped in the roof assembly or ceiling cavity often produces a detectable smell before visible water appears
- Sagging ceiling tiles — tiles absorb moisture and sag before they stain, making this an even earlier indicator than discoloration
- Increased humidity in specific areas — localized humidity spikes, particularly on upper floors, can indicate moisture entering through the roof assembly
- Unexplained increases in energy costs — saturated insulation loses approximately 40% of its R-value, forcing HVAC systems to work harder to maintain temperature. A sudden energy cost increase can be the first sign of widespread insulation saturation from a slow leak
- Mold growth on interior surfaces — mold establishing on ceiling tiles, wall surfaces, or in ceiling cavities indicates sustained moisture exposure that may originate from a roof leak
Assessing Leak Severity
Severity classification determines your response timeline and budget. The three severity levels correspond to different response protocols, cost ranges, and potential consequences of delayed action.
Minor: Manageable Drip or Stain
A minor leak presents as a slow drip, a small ceiling stain, or a damp spot that appears only during heavy rain. The water volume is small enough to manage with a single container. No equipment or inventory is at immediate risk. While this may seem like a low-priority issue, it is important to understand what a minor leak represents: the visible water is a fraction of what is trapped in the insulation above.
Response protocol: Place a container to catch water and protect any contents below the drip zone. Schedule a professional leak investigation within 1-2 weeks. Do not attempt to seal the leak from inside — the entry point on the roof is almost certainly not directly above the interior drip. Cost for professional diagnosis and simple repair: $300-800.
Moderate: Steady Flow Affecting a Room or Area
A moderate leak produces a steady or intermittent flow that affects an identifiable area of the building. Multiple ceiling tiles may be stained or sagging. The leak may be large enough to require multiple containers or tarps to protect the floor area. Operations in the affected area are disrupted or need to be relocated.
Response protocol: Protect interior contents immediately — move equipment, cover inventory with tarps, and relocate operations if necessary. Contact a roofing contractor for emergency service within 24-48 hours. Document the leak location, approximate flow rate, and any ceiling or wall damage with photos and video. This documentation serves both insurance and warranty purposes. Typical repair cost: $500-2,500 for the membrane repair, plus $3,000-8,000 if saturated insulation must be replaced.
Major: Significant Water Entry Threatening Operations
A major leak involves substantial water volume that threatens equipment, inventory, electrical systems, or occupant safety. Water may be flowing rather than dripping, affecting multiple areas, or pooling on the floor. Business operations cannot continue normally in the affected zones.
Response protocol: Protect people first — if water is near electrical panels, equipment, or wiring, contact an electrician before attempting any other response. Move critical equipment and inventory away from the affected area. Call a roofing contractor for same-day emergency service. Contact your insurance carrier to report the claim. Document everything with photos, video, and timestamps. Do not authorize permanent repairs until the insurance adjuster has inspected, but temporary tarping to prevent further damage is appropriate.
Why the Source Is Not Above the Drip
This is the single most important concept for building owners to understand about flat roof leaks. On a pitched residential roof, water enters and runs straight down to the ceiling below. On a flat commercial roof, the physics are entirely different. Water enters through a membrane breach and encounters a horizontal insulation layer that acts like a sponge.
Water travels laterally through saturated insulation, sometimes 10 to 20 feet from the entry point. The water moves through the insulation along paths of least resistance — following the grain of the insulation boards, pooling at low spots on the deck, and eventually finding a downward path through a deck seam, a fastener hole, or a structural member. The point where water finally drips through the ceiling may bear no obvious relationship to the point where it entered the roof.
This lateral travel explains why caulking the ceiling above a drip never fixes a flat roof leak. The entry point is on the roof, possibly 15 feet away from where you see the drip. Finding that entry point requires investigation from the roof side — which is why professional leak diagnosis is not optional for flat roof leaks. A roofer applying a patch directly above the interior drip, without investigation, is guessing — and that guess is wrong more often than it is right.
Common Leak Sources
Seam Failures
Seams are the most common source of leaks on single-ply roofing systems. Every joint where two membrane sheets overlap is a potential failure point. On TPO and PVC systems, incomplete heat welds from improper machine settings, contaminated surfaces, or moisture during welding create gaps that allow water entry. On EPDM systems, adhesive tape seams lose bond strength over time from UV exposure, thermal cycling, and moisture. Seam repairs cost $200-500 for isolated failures.
Flashing Failures
Penetration Failures
Every pipe, conduit, vent, and drain that passes through the roof membrane is a potential leak source. The seal between the membrane and the penetrating object must remain watertight through decades of thermal expansion, contraction, vibration, and UV exposure. Pipe boots crack, drain flanges lift, and pitch pockets dry out. Penetration repairs are typically straightforward — $300-800 per penetration — but the challenge is identifying which penetration is leaking, since water may travel far from the source.
Field Membrane Damage
Punctures, tears, and splits in the open membrane field are caused by foot traffic, dropped tools, wind-borne debris, and hail impact. These are often the most difficult leaks to locate because they can occur anywhere on the roof surface and the breach may be too small to see during a visual inspection. Electronic leak detection — which sends a low-voltage signal across the membrane and detects current flow through breaches — is the most reliable method for finding field membrane damage. Detection costs $0.10-0.25 per square foot for the area tested.
Drain Failures
Roof
What to Do When You Discover a Leak
Step 1: Protect Interior Contents
Your immediate priority is preventing damage to the building contents below the leak. Place containers to catch water, lay tarps over equipment and inventory that cannot be moved, and relocate sensitive items (electronics, paper documents, perishable inventory) away from the affected area. If water is flowing near electrical panels or equipment, shut off power to the affected circuits before handling any wet materials.
Step 2: Document Everything
Thorough documentation serves three purposes: insurance claims, warranty claims, and contractor communication. Photograph the leak location from multiple angles, including a wide shot showing the affected area and close-ups of any visible damage. Video the active drip or flow to document the rate. Note the date, time, weather conditions, and how long the leak has been active. Measure the leak location from two perpendicular walls — this measurement allows the roofer to locate the corresponding position on the roof surface.
Step 3: Do Not Apply DIY Repairs From Inside
Sealing a leak from the interior is ineffective on a flat roof because the entry point is almost never directly above the drip. Generic caulk applied to the ceiling or deck from below does not address the actual membrane breach, is not compatible with roofing membranes, and can make professional diagnosis more difficult by altering the water path. The exception: if you have attic or plenum access above the ceiling and can see active water on the deck, placing a tarp or container at that point can reduce interior damage while you wait for professional service.
Step 4: Contact a Roofing Professional
Provide the contractor with your documentation and a clear description of the situation. Tell them the severity (minor drip, steady flow, or major water entry), when the leak started, whether it only occurs during rain or also when dry, and the measured interior location. This information helps the roofer arrive prepared with the right investigation method and repair materials for your specific membrane type.
When to Call a Professional
Every active leak requires professional repair — the question is response time. A minor drip in a non-critical area can be scheduled for the next business day or within 1-2 weeks. A steady flow affecting operations should be addressed within 24-48 hours. Major water entry threatening equipment, inventory, or occupant safety demands same-day emergency response.
Do not wait to see if the leak "goes away" when the rain stops. A leak that stops dripping when the rain ends does not mean the problem is resolved. It means the water supply has stopped, but the membrane breach remains, the insulation is still saturated, and the next rain event will produce the same leak — likely worse, because saturated insulation holds water that can flow to the breach faster. Every delay allows additional insulation saturation and structural damage.
Frequently Asked Questions
Why does my roof leak in one spot but the damage is in a different location?
Water travels laterally through insulation on flat roofs. The entry point on the roof surface and the drip point on the interior ceiling can be 10-20 feet apart. Water follows paths of least resistance through the insulation, pooling at low spots on the deck before finding a downward path through seams, fasteners, or penetrations. Professional investigation from the roof side is essential to locate the actual entry point.
Can I fix a commercial roof leak myself?
Temporary protection measures are appropriate, but permanent repair requires professional execution. Building owners should place containers, protect contents, and document the leak. Permanent repair requires membrane-specific materials, proper surface preparation, and knowledge of the system. Generic sealants are not compatible with roofing membranes and can make the problem harder to repair correctly later.
How much does it cost to repair a commercial roof leak?
Costs range from $300 for a simple patch to $10,000+ when insulation replacement is needed. Simple membrane patches and seam re-welds: $300-500. Flashing repairs: $800-2,500. Emergency after-hours service: $500-2,500. Saturated insulation replacement: $3,000-8,000 depending on the area. These are Gulf Coast market ranges that vary by membrane type, accessibility, and scope.
Should I file an insurance claim for a roof leak?
File a claim if the leak results from a covered peril — typically wind, hail, or storm damage. Most property policies require timely reporting, so notify your carrier promptly after any storm-related leak. Leaks from wear, aging, or deferred maintenance are generally not covered by property insurance but may be covered by your roofing warranty if applicable. Document the leak thoroughly regardless of the cause.
How do roofers find the source of a flat roof leak?
Professional methods include visual inspection, electronic leak detection, infrared thermography, and flood testing. Visual inspection examines seams, flashings, and penetrations for visible defects. Electronic detection uses electrical conductivity to locate membrane breaches. Infrared thermography identifies wet insulation by temperature differential — wet areas appear warmer at night as they retain heat. The appropriate method depends on the roof system, suspected location, and investigation conditions.